

How To Paint Plastic Car Parts To paint plastic car parts, prepare the surface, choose appropriate paint, apply primer, and seal with clear coat. Painting plastic car parts can restore their appearance and protect them from damage.
Whether you want to refresh the look of your vehicle or customize it, painting plastic parts can be a cost-effective solution. By following the proper steps and using the right materials, you can achieve a professional finish that will last.
In this guide, we will explore the steps and techniques for painting plastic car parts effectively and efficiently. Let’s dive into the process of transforming your car’s appearance with a fresh coat of paint on its plastic components.
Choosing The Right How To Paint Plastic Car Parts : Ultimate Guide for Flawless Finish?
- Acrylic Lacquer: Ideal for a glossy finish.
- Enamel: Resistant to chipping and durable.
- Compatibility with plastic material.
- Weather resistance for long-lasting results.
Preparing The Surface Plastic Car Parts
To paint plastic car parts, it is essential to prepare the surface. By thoroughly cleaning and sanding the plastic, you can ensure proper adhesion and a smooth finish for the paint to adhere to. Using a quality primer will also help improve the paint’s durability and longevity on the plastic surface.
Cleaning The Plastic Surface
Cleaning the plastic surface is the first step in preparing it for painting. It is crucial to remove any dirt, grease, or contaminants that may be present, as these can affect the adhesion of the paint. Here is a simple process to clean the plastic surface:
- Gently wash the plastic part with soap and water using a soft cloth or sponge. This will help remove any loose debris.
- Rinse the part thoroughly with clean water to ensure any soap residue is completely removed.
- Dry the plastic part using a lint-free cloth or allow it to air dry completely.
- For stubborn stains or contaminants, you can use a mild solvent, such as isopropyl alcohol, to clean the surface. Apply the solvent to a clean cloth and gently scrub the affected area.
By ensuring the plastic surface is clean, you create an ideal foundation for the paint to adhere effectively.
Sanding For Adhesion
Sanding the plastic surface is the next step in preparing it for painting. The purpose of sanding is to create a slightly rough texture, allowing the paint to adhere better to the plastic. Follow these steps to sand the surface:
- Choose a fine-grit sandpaper, around 320 to 400 grit, for sanding plastic. Coarser grits may damage the surface.
- Wet the sandpaper with water and gently sand the plastic in a circular motion. Be sure to sand the entire surface evenly, applying light pressure.
- Rinse the plastic part with clean water to remove any debris from sanding. Pat it dry with a lint-free cloth.
Sanding the plastic surface not only improves adhesion but also helps to smooth out any imperfections, resulting in a more professional-looking finish.
Masking And Priming
When it comes to painting plastic car parts, proper masking and priming are crucial steps to ensure a high-quality, durable finish. Masking and priming play a vital role in the overall painting process, contributing to the longevity and aesthetic appeal of the painted plastic surfaces.
Importance Of Masking
Making use of the right masking materials is essential to protect the surrounding areas of the car from overspray during the painting process. Masking ensures that only the intended plastic parts receive the paint and helps prevent any unwanted paint on other areas of the vehicle.
Priming For Durability
Priming creates a strong bond between the plastic surface and the paint, promoting adhesion and enhancing the durability of the painted finish. Proper priming also helps to seal the surface, preventing any imperfections or blemishes from showing through the paint, leading to a more professional and long-lasting result.
Credit: ceramicpro.com
Techniques
When it comes to painting plastic car parts, using the right techniques can make a significant difference in the end result. Here, we’ll explore essential painting techniques for achieving a professional finish on plastic car parts.
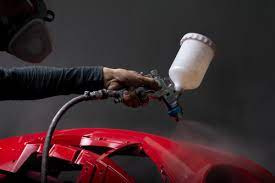
Spray
Spray painting is a popular method for painting plastic car parts due to its ability to create a smooth, even finish. Before painting, ensure the plastic surface is clean and free from dust, grease, and any imperfections. Using primer designed specifically for plastic will help the paint adhere better and improve the durability of the finish.
- Choose paints specifically formulated for use on plastic surfaces to ensure adhesion and resilience.
- Hold the spray can approximately 6-8 inches away from the surface and apply the paint in thin, even coats, allowing each coat to dry before applying the next layer.
- Consider using a spray gun for larger plastic car parts, as it provides more control and a professional finish.
Avoiding Common Mistakes
When painting plastic car parts, certain mistakes can lead to subpar results. One common mistake is applying too much paint at once, leading to drips and an uneven finish. Additionally, failing to properly prepare the surface can result in the paint peeling or flaking over time.
- Take time to sand the plastic surface lightly to create a better bonding surface for the paint and primer.
- Ensure the plastic part is completely dry before painting to prevent moisture from affecting the paint adhesion.
- Consider applying a clear coat after painting to provide an additional layer of protection and enhance the longevity of the finish.
Drying And Curing
To paint plastic car parts effectively, proper drying and curing are crucial. Allow each coat to dry completely before applying the next to ensure a durable and long-lasting finish. Following these steps will help you achieve a professional-looking paint job on your plastic car components.
Allowing Sufficient Drying Time
After you have applied the paint to your plastic car parts, the next crucial step is to allow them to dry completely. Properly dried paint will ensure a smooth and flawless finish that will last. So, how long should you let the paint dry? It’s essential to follow the manufacturer’s guidelines for drying time. Generally, most paints will dry to the touch within 15-30 minutes, but this doesn’t mean they are fully cured.
Patience is key when it comes to drying your newly painted plastic car parts. To avoid any issues with the paint job, it is recommended to wait a minimum of 24 hours before proceeding to the next steps. This waiting period will allow the paint to dry completely and ensure optimal adhesion and durability.
Keep in mind that the drying time can vary depending on factors such as humidity, temperature, and the type of paint used. Higher humidity and cooler temperatures can extend the drying time, so it’s best to paint in a well-ventilated area with moderate temperature and low humidity for the best results.
Ensuring Proper Curing
Once your painted plastic car parts have dried, the next crucial step is to ensure proper curing. Curing involves allowing the paint to fully harden and bond with the surface, providing long-lasting protection and a professional-looking finish. Skipping or rushing this step can result in a subpar paint job and reduced durability.
To ensure proper curing, it is recommended to wait at least 48 hours before handling or reinstalling the plastic parts. This extended waiting period allows the paint to fully cure and reach its maximum hardness. Treat the freshly painted parts with care during this time to avoid any accidental damages or scratches that may compromise the final result.
Additionally, it’s important to note that the curing process can also be affected by environmental factors. Higher temperatures can speed up the curing time, but it’s crucial to avoid exposing the freshly painted parts to extreme heat or direct sunlight, as this can cause the paint to bubble or crack. It’s best to store the parts in a cool, dry place while they cure, away from any potential hazards.
By allowing sufficient drying time and ensuring proper curing, you can achieve a professional-looking finish on your plastic car parts. Taking the time to follow these steps will ensure that your paint job lasts and remains vibrant for years to come.
Buffing And Polishing
Now, let’s dive into the essential step of buffing and polishing to achieve a smooth finish on your painted plastic car parts.
Achieving A Smooth Finish
Start by ensuring the painted surface is fully cured before proceeding with buffing and polishing for the best results.
Using Polishing Compounds
- Select a high-quality polishing compound suitable for plastic surfaces.
- Apply a small amount of the polishing compound onto a clean, soft cloth or buffing pad.
- Work the polishing compound onto the painted plastic surface in circular motions.
- Continue buffing until a glossy and smooth finish is achieved.
Remember to follow the manufacturer’s instructions when using polishing compounds for plastic car parts.
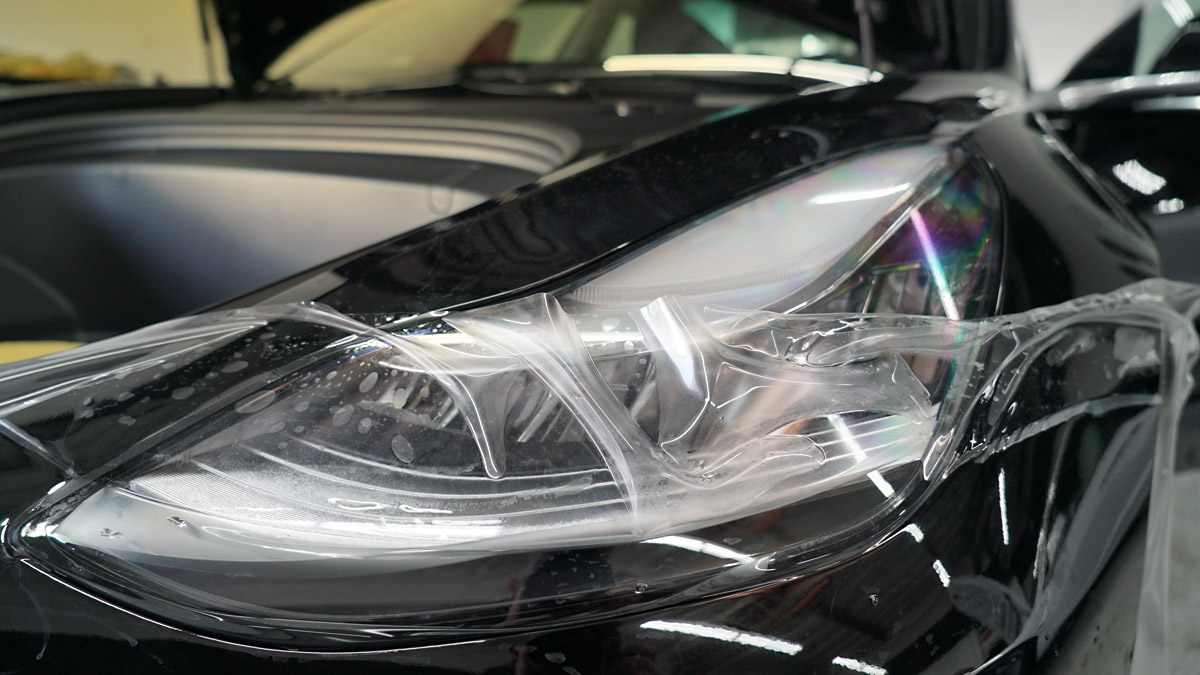
Protective Coating
Applying a protective coating to painted plastic car parts is crucial for long-lasting durability.
Applying A Clear Coat
A clear coat acts as a protective layer over the base paint, enhancing shine and preventing damage.
Benefits Of Uv Protection
- UV protection prevents the paint from fading or becoming discolored when exposed to sunlight.
- Increases longevity of the paint job and maintains the vibrant color of the plastic parts.

Credit: www.amazon.com
Final Touches
Once you have completed painting your plastic car parts, it’s time for the final touches to ensure a professional finish. These last steps will help you remove masking tape without damage and inspect for any imperfections that need to be addressed.
Removing Masking Tape
It’s essential to remove the masking tape carefully to avoid any accidental smudging or peeling of the paint. Here’s how you can do it:
- Start by pulling the tape off slowly and steadily, at a 45-degree angle.
- Try not to pull it straight up, as this can lead to paint chip-off.
- If you notice any resistance while removing the tape, use a utility knife to gently score along the edge before peeling.
- Take your time and be patient to prevent any damage to your newly painted plastic car parts.
Inspecting For Imperfections
Before you consider your project complete, take a close look at your work and inspect for any imperfections. Here’s what you should look out for:
- Check for uneven coverage or areas where the paint may have pooled or dripped.
- Examine the surface for any dust or debris that may have settled during the drying process.
- Look for any runs or sags in the paint that need to be addressed.
- If you notice any imperfections, lightly sand the affected area with fine-grit sandpaper and touch up with additional paint if necessary.
By taking the time to remove the masking tape properly and inspect for imperfections, you can ensure a flawless finish on your plastic car parts. These final touches will make all the difference in the overall appearance of your car and leave you with a job well done.
Maintenance Tips
Keeping your painted plastic car parts in top condition requires proper maintenance. By following these maintenance tips, you can ensure that your car parts look great and last for a long time.
Cleaning And Care Recommendations
Proper cleaning and care are essential for maintaining the quality of the paint on plastic car parts. Here are some recommendations for keeping your painted plastic car parts in good condition:
- Regular Cleaning: Clean the painted plastic parts regularly using a mild soap and water solution to remove dirt and grime.
- Avoid Harsh Chemicals: Avoid using abrasive or harsh chemicals, as they can damage the paint.
- Protect from Sun: Park your car in the shade or use a car cover to protect the painted plastic parts from prolonged exposure to the sun, which can cause fading.
- Waxing: Apply a coat of high-quality automotive wax to protect the paint and provide a glossy finish.
Handling Minor Touch-ups
Minor touch-ups may be necessary to maintain the appearance of painted plastic car parts. Here are some tips for handling minor touch-ups:
- Surface Preparation: Clean the area to be touched up and ensure it is free from dirt and debris.
- Use Touch-Up Paint: Apply touch-up paint specifically designed for plastic car parts, following the manufacturer’s instructions.
- Allow for Proper Drying: Allow the touch-up paint to dry completely before applying a protective clear coat, if necessary.
- Regular Inspection: Periodically inspect the painted plastic parts for any signs of wear or damage and address minor touch-ups promptly.
Credit: autoprotoway.com
Troubleshooting
When it comes to painting plastic car parts, troubleshooting is an essential aspect of the process. Even with careful preparation and application, issues may arise that need to be addressed. Understanding how to troubleshoot common paint defects and adhesion issues will help you achieve a professional and long-lasting finish on your plastic car parts.
Dealing With Paint Defects
Paint defects can be frustrating, but they are not uncommon. Here are some common paint defects and their solutions:
- Blistering: If bubbles appear in the paint film, it may be due to moisture trapped in the substrate. Strip away the affected area, allow it to dry completely, and then repaint.
- Orange Peel: This textured surface resembles the peel of an orange. To remedy this, sand the affected area, then apply a new coat of paint using a finer spray pattern.
- Runs and Sags: Excessive paint application can result in runs or sags. Carefully sand the affected area, then repaint with a lighter touch to achieve an even finish.
Fixing Adhesion Issues

Credit: autoprotoway.com
Adhesion issues can lead to paint peeling or flaking, compromising the durability of the finish. Here’s how to address and prevent adhesion problems:
- Surface Cleaning: Ensure the plastic surface is thoroughly cleaned and free from any contaminants that may interfere with paint adhesion.
- Primer Application: Apply a high-quality plastic primer to enhance the adhesion of the paint to the plastic substrate.
- Sand and Recoat: If adhesion issues arise, gently sand the affected area and recoat with paint, ensuring proper drying time between coats.
Frequently Asked Questions Of
How Can I Prepare Plastic Car Parts For Painting?
How To Paint Plastic Car Parts To prepare plastic car parts for painting, start by cleaning the surface with soap and water, then sand it to remove any existing paint or rough patches. Once the surface is smooth, apply a plastic adhesion promoter before priming and painting.
What Type Of Paint Should I Use For Plastic Car Parts?
For painting plastic car parts, use a high-quality spray paint designed specifically for plastic surfaces. Look for paints labeled as “plastic paint” or “plastic bonding paint” to ensure good adhesion and long-lasting results.
Can I Paint Over Existing Paint On Plastic Car Parts?
Yes, you can paint over existing paint on plastic car parts, but it’s crucial to properly prepare the surface by sanding and cleaning it. Applying a plastic adhesion promoter before painting can help the new paint adhere better to the existing surface.
Conclusion
How To Paint Plastic Car Parts To sum up, painting plastic car parts is a simple and cost-effective way to enhance the look of your vehicle. By following the steps outlined and using the right materials, you can achieve professional-looking results. Remember to properly prepare the surface, apply multiple coats, and allow sufficient drying time for a long-lasting finish.
With a little patience and attention to detail, you can transform the appearance of your car and give it a fresh new look. Happy painting!
Using Polishing Compounds
-
- Select a high-quality polishing compound suitable for plastic surfaces.
-
- Apply a small amount of the polishing compound onto a clean, soft cloth or buffing pad.
-
- Work the polishing compound onto the painted plastic surface in circular motions.
-
- Continue buffing until a glossy and smooth finish is achieved.
Remember to follow the manufacturer’s instructions when using polishing compounds for plastic car parts.
